


工作经验
生活热情
长期主义
Android -> 跨平台-> AI工程师
抖音、小红书、X、博客
富士xh2+腾龙18300一镜走天涯
Build with AI 超过 4 年,AI Native 是目标

macOS 工具 - 原生 Finder 扩展,在右键菜单中添加「新建文件」。在你工作的地方直接创建文件。
AI 开发工具 - 按住 Shift 点击页面元素,捕获 UI 修改需求。为你的 AI 编程助手生成结构化提示词。
教学工具 - 用于录制教程的虚拟键盘面板。实时按键高亮、组合键显示、极简录屏模式。
AI 助手 - 对话优先的个人助手。通过自然语言管理任务、日历和财务。

照片工具 - 智能照片清理与压缩工具,专为 iOS 设计。滑动整理,压缩节省空间。
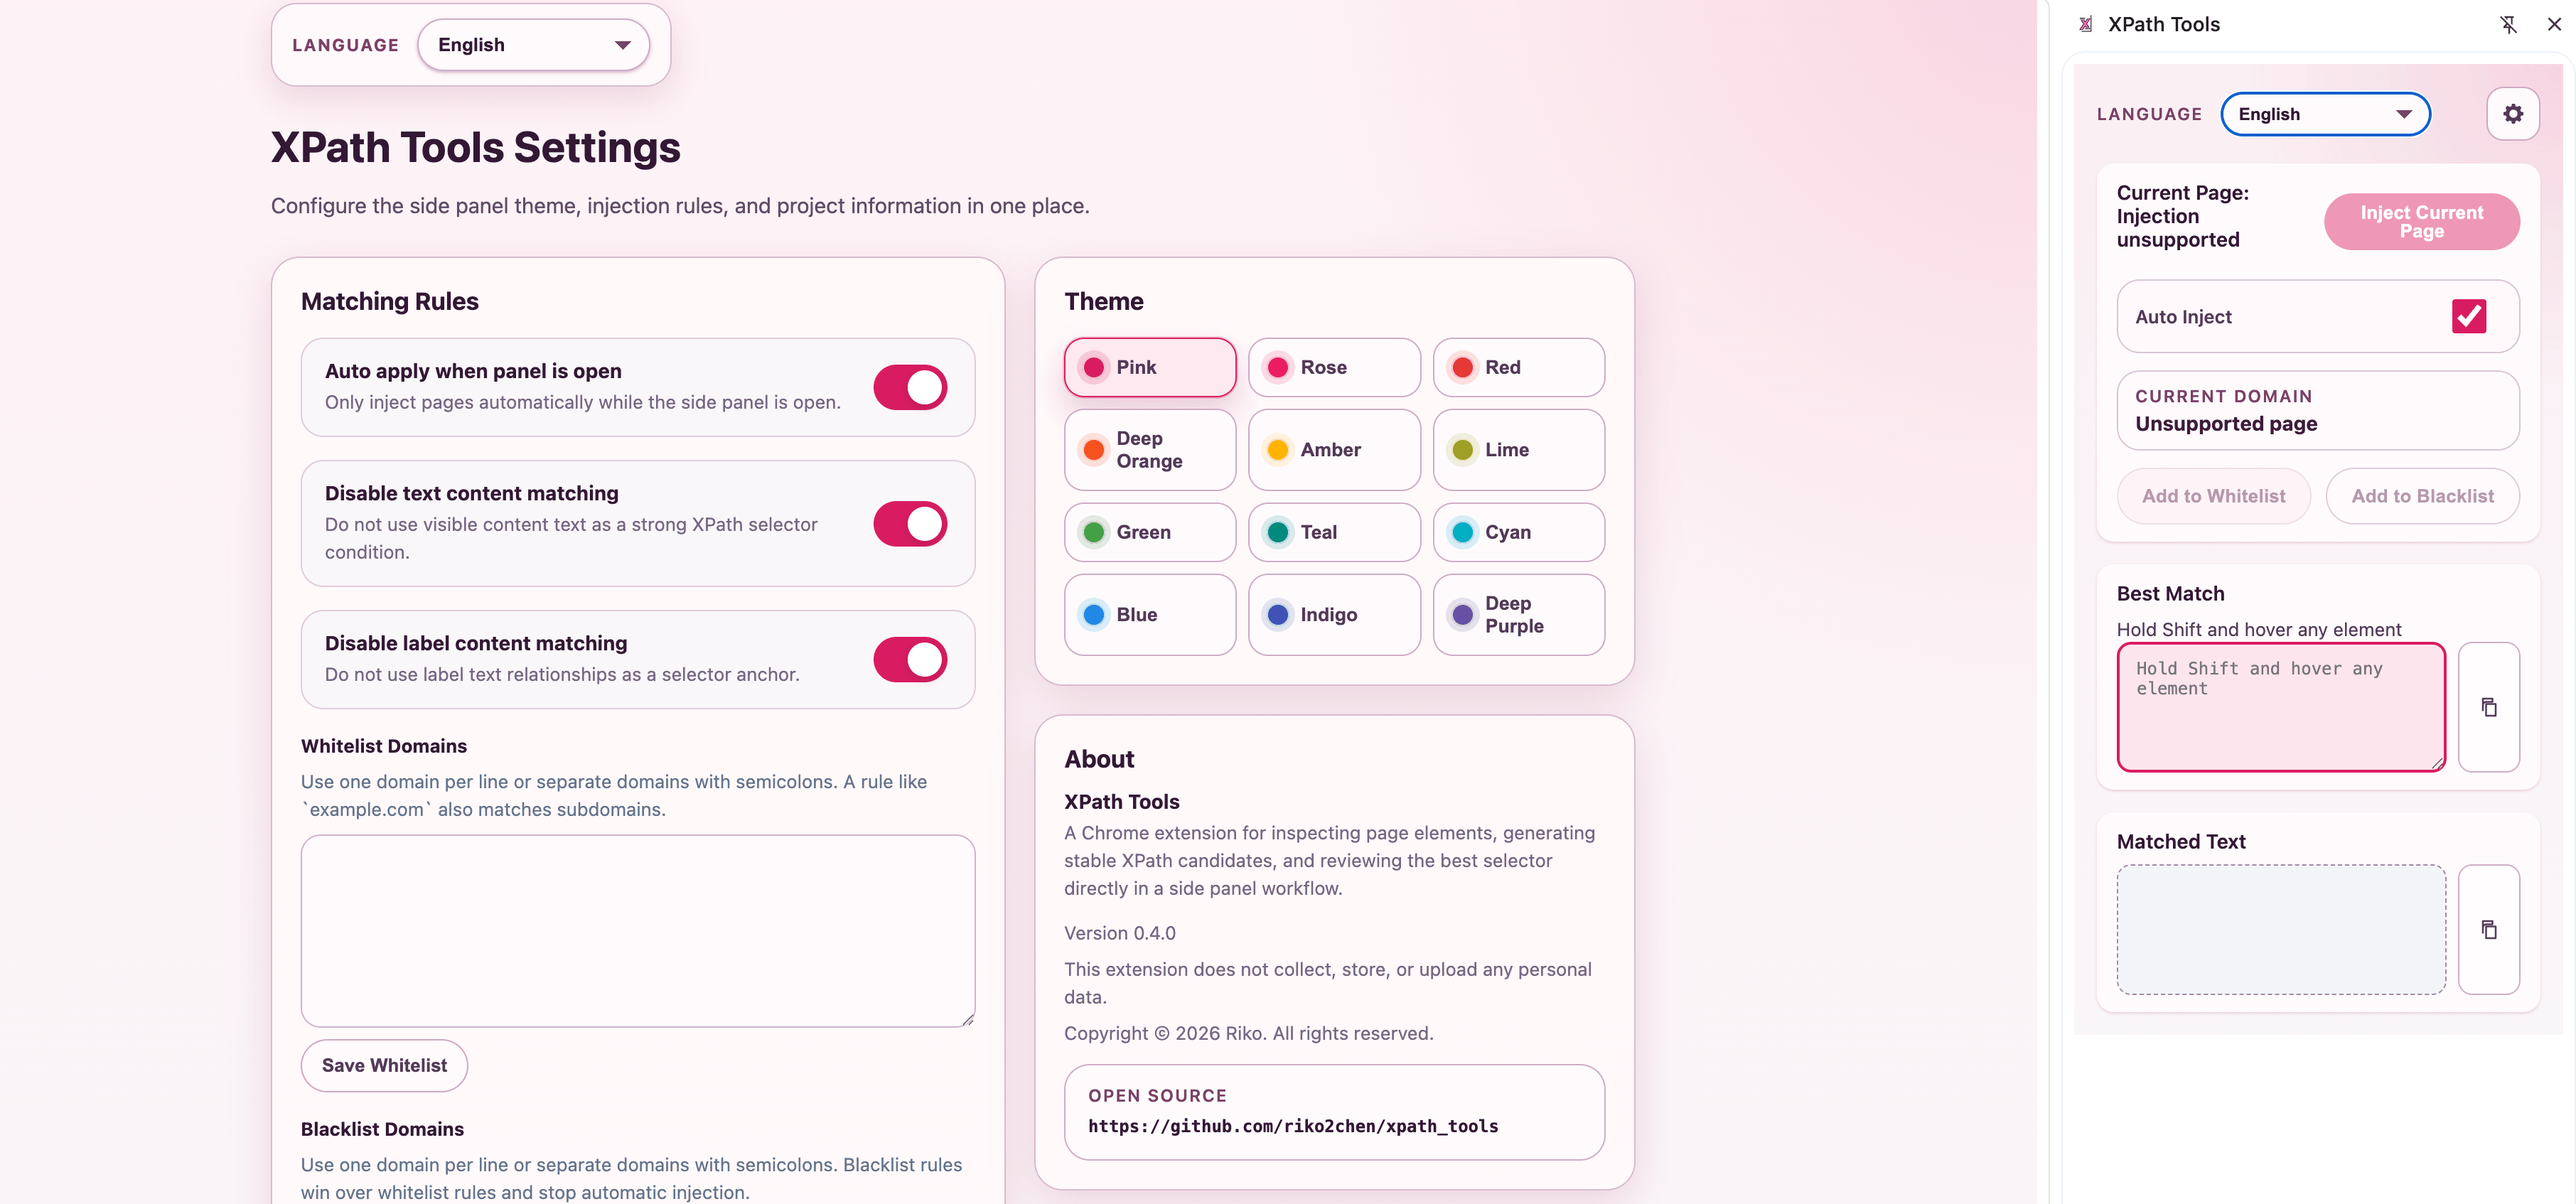
开发者工具 - 即时生成和验证 XPath 选择器。Web 自动化开发者的得力助手。

Android 工具 - 不再错过任何通知。在重要时刻自动点亮屏幕。
“Typeless的价值在于把人脑的summarize和compact过程延迟到输出之后,减少了并发、减少了信息丢失、减少了计算量。”
“人与智人的区别是人会制造和使用工具。使用 cli AI工具的一个 Aha Moment 是 AI 自己编写了一个工具来解决问题。 ”
“AI 的时代人人都可以通过自然语言编写程序,这就意味着,每个人都可以通过 AI 来做出符合自己需求的个人系统, 通用的系统会成为过去,个性化的会成为主流.”
“当人人都可以用AI的时候,程序员的价值在哪里呢?我认为依然是判断力、理解、效率、表达。过去的编码难度被高估了,沟通和设计被低估了。”
If you have anything you'd like to discuss, any ideas you want to bounce around, please send me a message.
