Build a Visual Music Player With Arduino and Processing
This is a small thing that was spent half a day with a classmate six months ago. Recently, I got the components and reproduced the production process, that’s why I recorded some procedures and experience here.
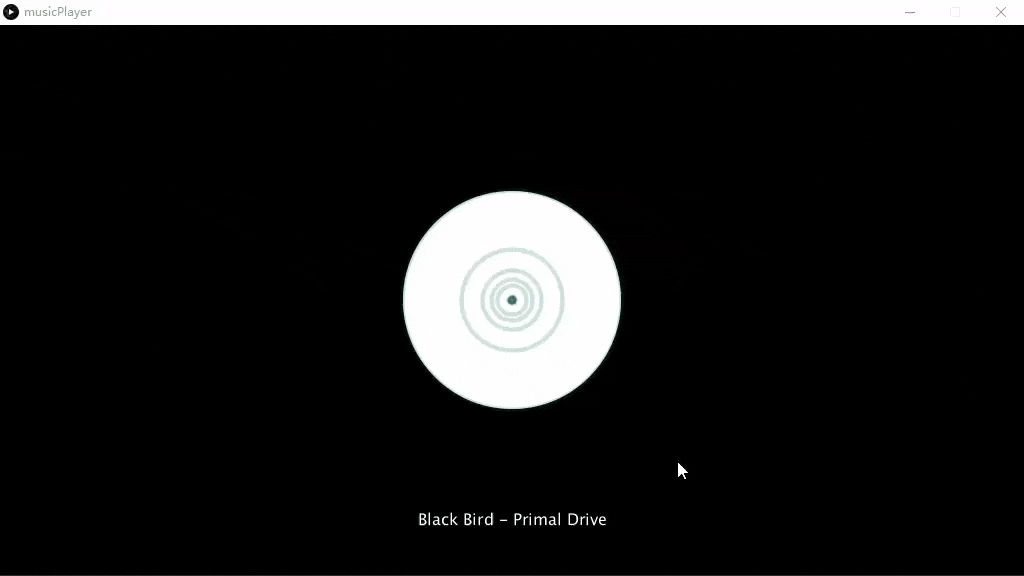
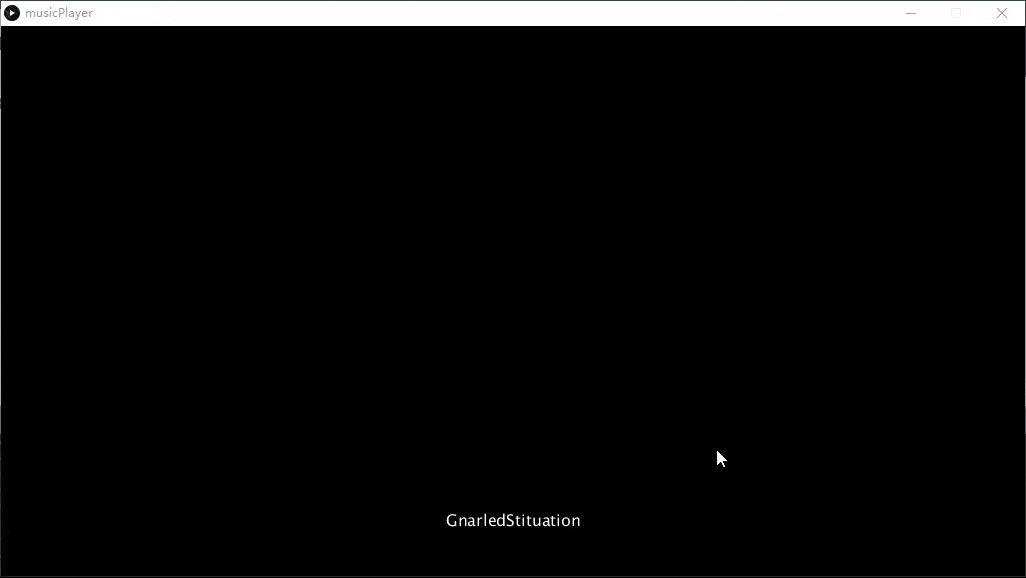
Result
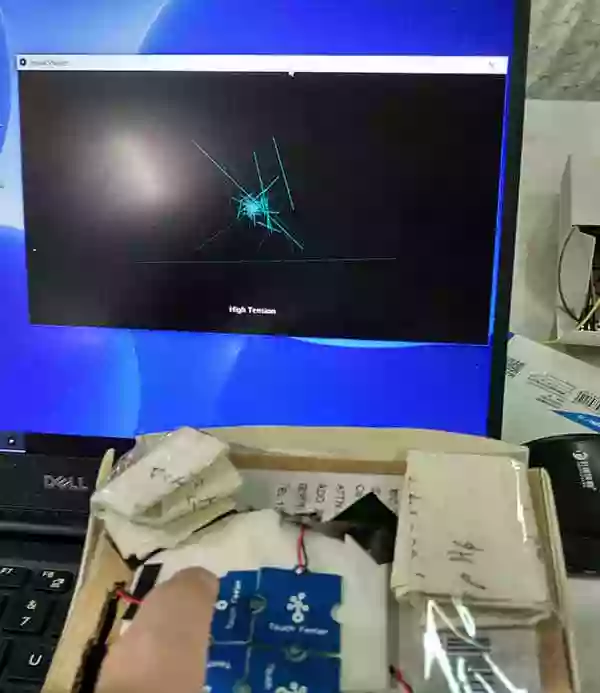
The actual operation diagram is as follows, the finger uses different gestures on the Touch Sensor to slide different operations.
Operating gif is as follows

The number of lines is changing following the rhythm.
Used Hardware
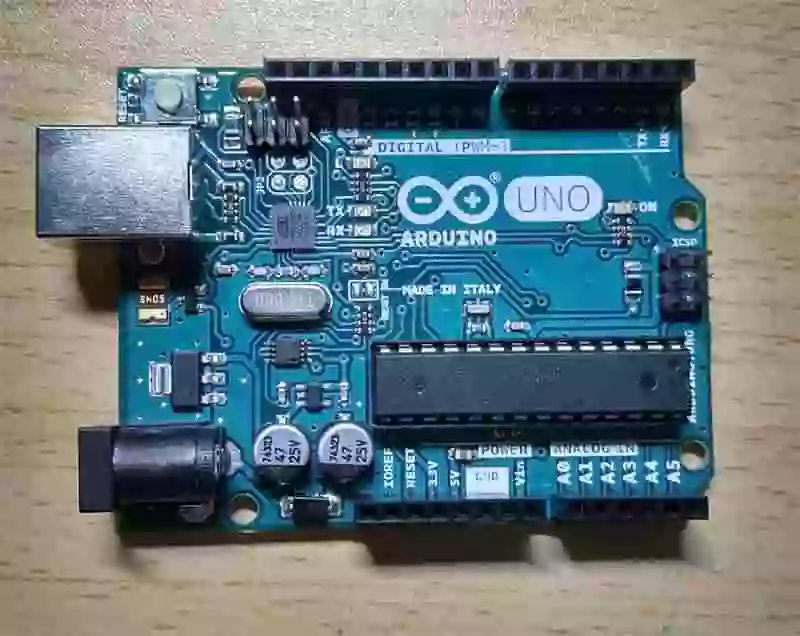
- Arduino Uno R3
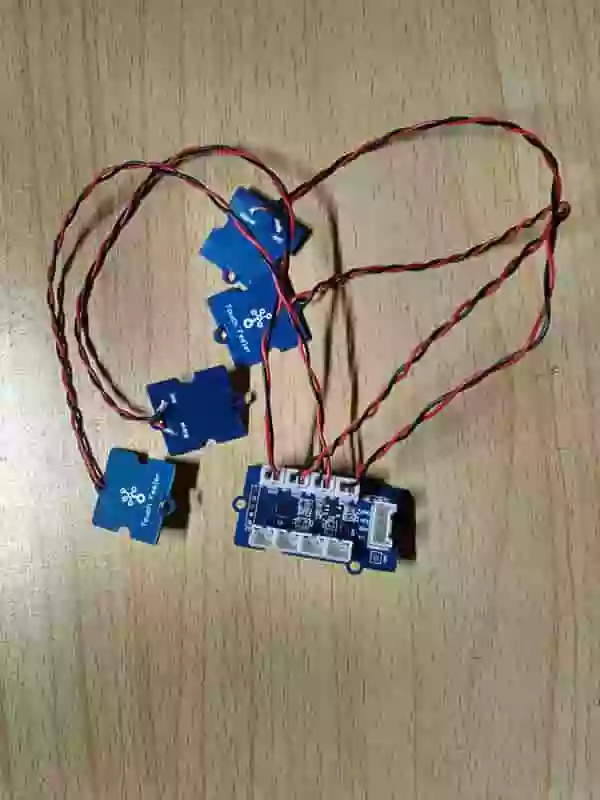
- I2C Touch Sensor
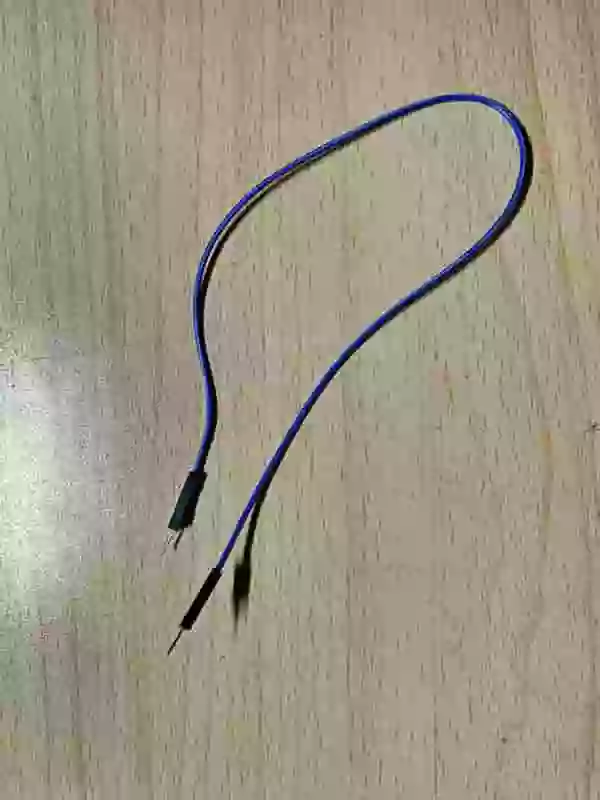
- DuPont line
Introduce of Hardware
Arduino Uno R3
Arduino is an open-source electronics platform based on easy-to-use hardware and software
Arduino includes hardware (development board) and software (IDE), and the developer has packaged many functions, making the Arduino easier to use than the 51 series. Arduino hardware and software are open source, everyone can copy, modify, sell Arduino development board, so in the internet super market you can buy a lot of low-cost compatible board. Thanks to the heat of the Arduino, you can easily get the modules you want. It can be said that Arduino is very good as a prototyping tool.
Compared to another common Raspberry Pi, the Arduino expansion module is much cheaper and more comprehensive.
Among the many Arduino development boards, the most famous is the Arduino Uno series, which is based on the ATmega328p microprocessor, 14 IO pins, including 6 PWM outputs, supporting TTL, USB, I2C, SPI communication.
I2C Touch Sensor
Online shopping malls in mainland China are sold less, which is a less common Touch Sensor。Parameters are here
It should be noted that the wiring at INT is easy to fall off and needs to be fixed.
The Touch Sensor can connect multiple sensor blades at the same time, and the sensor is also very sensitive and has high playability.
Used Software
Both software are cross-platform and are recommended for use on Windows. If you are installing on Linux, you may need to deal with the Arduino driver problem, which is a bit of a hassle.
Introduce of Software
###Arduino IDE
When installing on Windows, the driver will be included. After connecting the Arduino, check whether the device manager has an unidentified device to determine that the driver is properly installed.
You need to select the port before running the program, as shown below: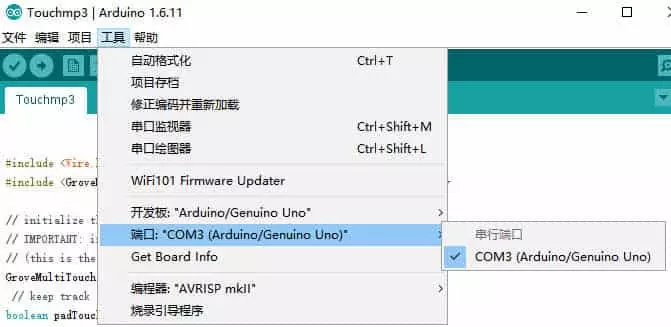
Processing
Processing is also a good tool for interactive design and visualization, performance is not bad, but also cross-platform. It also has extensions, such as Processing.js, which are convenient to use overall.
Design of Programming
Part of Arduino
First import the Library of the I2C Touch Sensor,than import the Library of MultiTouch for test. After that, connect the I2C Touch Sensor and Arduino, the INT connecting to port 7, VCC to 5V。
Then open the example and select GroveI2CTouchTest,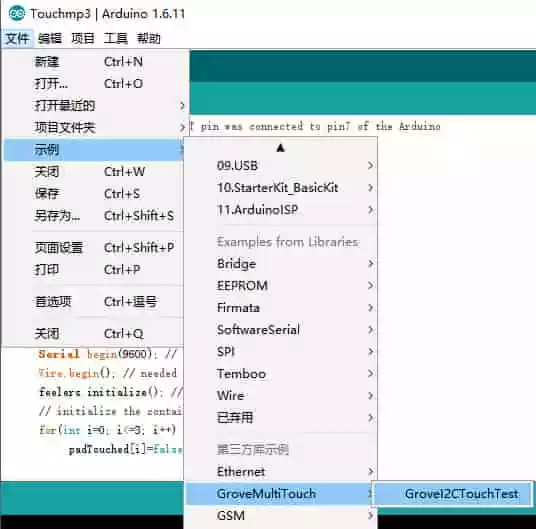
Run the sample program to test if the I2C Touch Sensor is working properly.
Then gently fix the four sensor pieces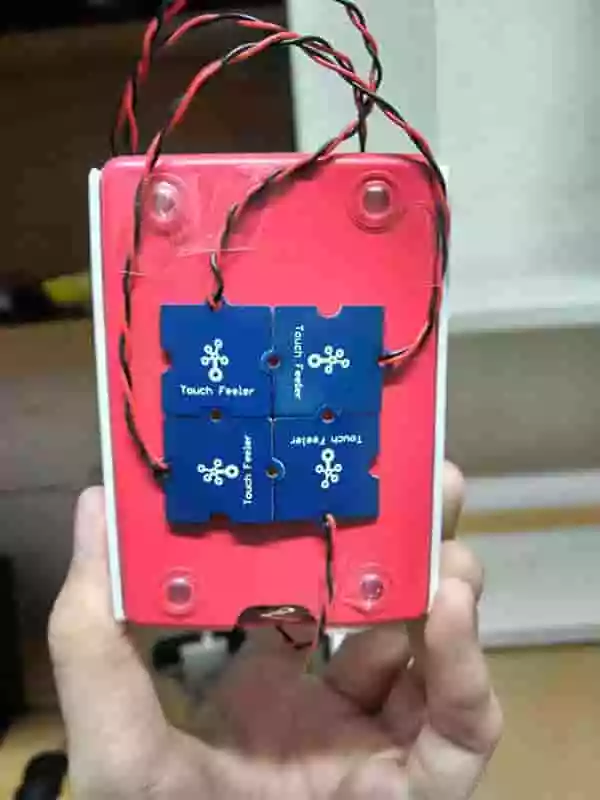
If the accuracy is not high, then GroveI2CTouchTest can be used directly. If you want to consider anti-missing and other issues, you need to make some optimizations, such as making a gesture every two seconds, rather than triggering a gesture.
Part of Processing
Because you want to decode the music, you need to import the Minim Library, After that , reading the Document to know usage.
Then for the realization of the dynamic effect, the code implements five kinds, here is a brief introduction:
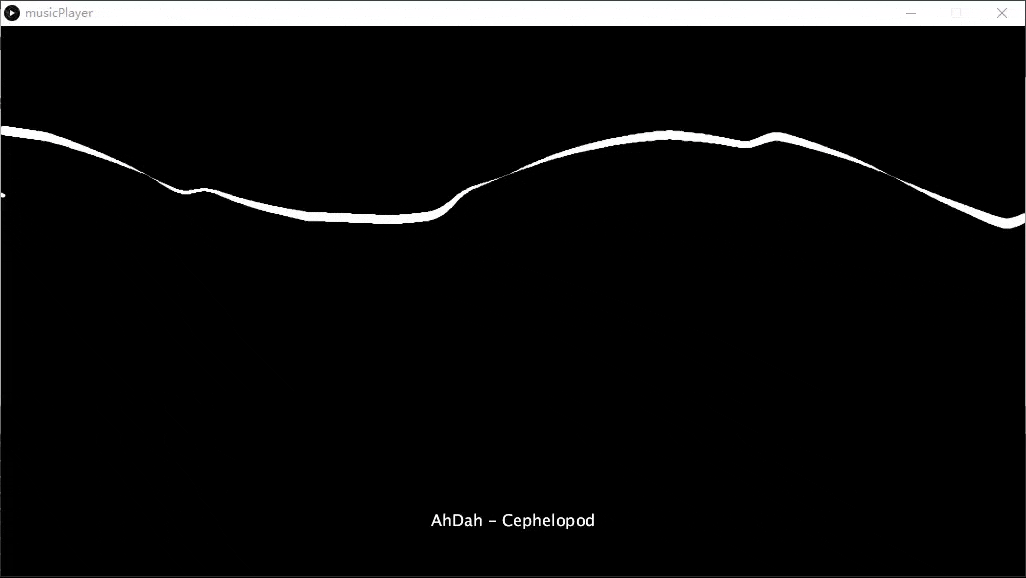
First, the wavy lines
1
2
3
4
5
6
7
8
9
10
void drawPic1() {
background(0);
stroke(255);
musicName(musicNumber);
for (int i=0; i<player.bufferSize()-1; i++)
{
strokeWeight(abs(player.left.get(i)*20));
line(i, 150+player.left.get(i)*100, i+1,150+player.left.get(i+1)*100);
}
}
Where player.left is the left channel, you can also use the right channel player.right, mix player.mix, player.left.get() will return a value between -1 and 1, so multiply by a few multiples to see The comparison is clear. The above code is a diagram of the waveform diagram. The next few principles are the same, except that the graphics are drawn differently.
Second, concentric circles
1
2
3
4
5
6
7
8
9
10
11
12
13
14
15
16
17
void drawPic2() {
int n;
int i;
float v;
stroke(255);
background(0);
musicName(musicNumber);
fft.forward(player.mix);
n = fft.specSize() / 4;
for (i = 0; i < n; i++) {
stroke(100.0*i/n, 100, 100, 50);
// Magnified multiple
v = fft.getBand(i) * 3;
ellipse(width/2, height/2, v, v);
}
}Ellipse was originally used to draw ellipse, which can alse used to draw standard circles.
Third, non-concentric circles
1
2
3
4
5
6
7
8
9
10
11
12
13
14
15
16
17
18
void drawPic3() {
float v;
float x, y;
int n;
int i;
stroke(255);
background(0);
musicName(musicNumber);
fft.forward(player.mix);
n = fft.specSize() / 4;
for (i = 0; i < n; i++) {
fill(100.0*i/n, 100, 100, 50);
v = fft.getBand(i) * 4;
x = random(0, width);
y = random(0, height);
ellipse(x, y, v, v);
}
Fourth, two lines
1
2
3
4
5
6
7
8
9
10
11
12
13
14
15
16
17
18
19
20
21
22
23
void drawPic4()
{
float v;
float x1, y1, x2, y2;
int n;
int i;
background(0);
musicName(musicNumber);
fft.forward(player.mix);
n = fft.specSize() / 4;
for (i = 0; i < n; i++) {
stroke(100.0*i/n, 100, 100);
v = fft.getBand(i) * 4;
x1 = random(-v, v) + width / 2;
y1 = random(-v, v) + height / 2;
x2 = random(-v, v) + width / 2;
y2 = random(-v, v) + height / 2;
line(x1, y1, x2, y2);
}
}
1
2
3
4
5
6
7
8
9
10
11
12
13
14
15
16
17
18
19
20
21
22
23
24
25
26
27
28
29
30
31
32
33
34
35
36
void drawPic5()
{
float v;
float x1, y1, x2, y2;
float dx1, dy1, dx2, dy2;
int u1, v1, u2, v2;
int n;
int i, j;
background(0);
musicName(musicNumber);
fft.forward(player.mix);
n = fft.specSize() / 4;
for (i = 0; i < n; i++) {
stroke(100.0*i/n, 100, 100, 50);
v = fft.getBand(i) * 4;
x1 = random(-v, v) + width / 2;
y1 = random(-v, v) + height / 2;
x2 = random(-v, v) + width / 2;
y2 = random(-v, v) + height / 2;
dx1 = (x1 - width/2) / 10;
dy1 = (y1 - height/2) / 10;
dx2 = (x2 - width/2) / 10;
dy2 = (y2 - height/2) / 10;
for (j = 0; j <= 9; j++) {
u1 = (int)(width/2 + j * dx1);
v1 = (int)(height/2 + j * dy1);
u2 = (int)(width/2 + j * dx2);
v2 = (int)(height/2 + j * dy2);
line(u1, v1, u2, v2);
}
}
}
The code of several kinds of graphics is relatively simple, so I won’t go into details. I will mention a few pits that I might encounter. When I draw the song name, it is easy to be covered by the graphic. Here, I use the font to draw the song name every time I draw the graph. To ensure that the song name is always visible, you can also split on the interface, but it is more troublesome to implement.
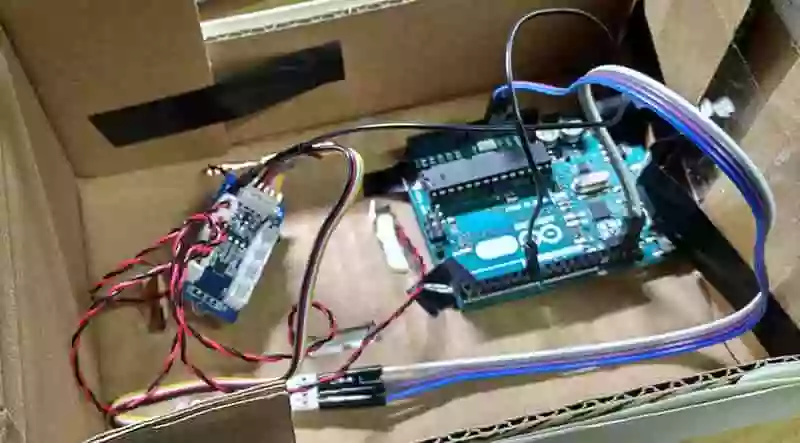
When the sensor was fixed on the protective case, the wire fell off, so I found a box to re-fix. Because there is no extended version on hand, I can only connect the I2C Touch Sensor directly to the Arduino. This has a problem, DuPont. The line is too thick and there is no way to access the four ports of the Touch Sensor.
So we removed the DuPont line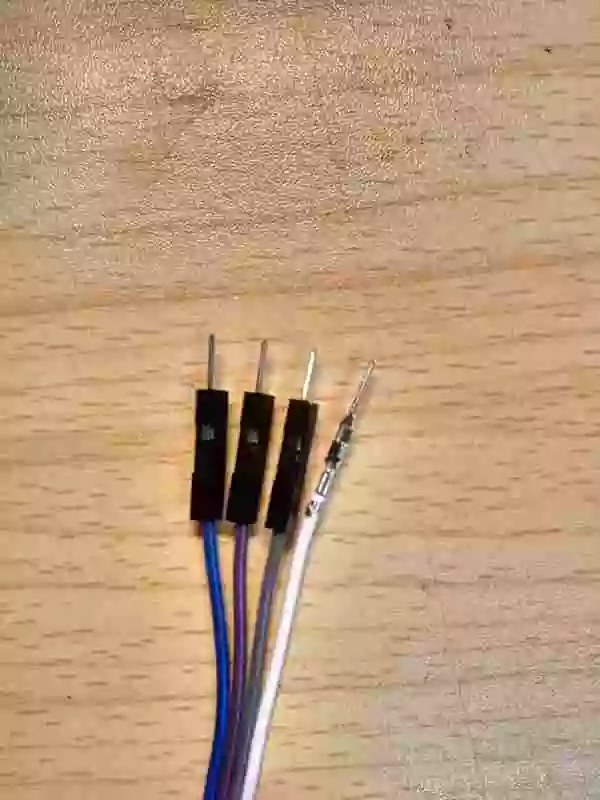
Before and after the comparison, the occupied space is much smaller.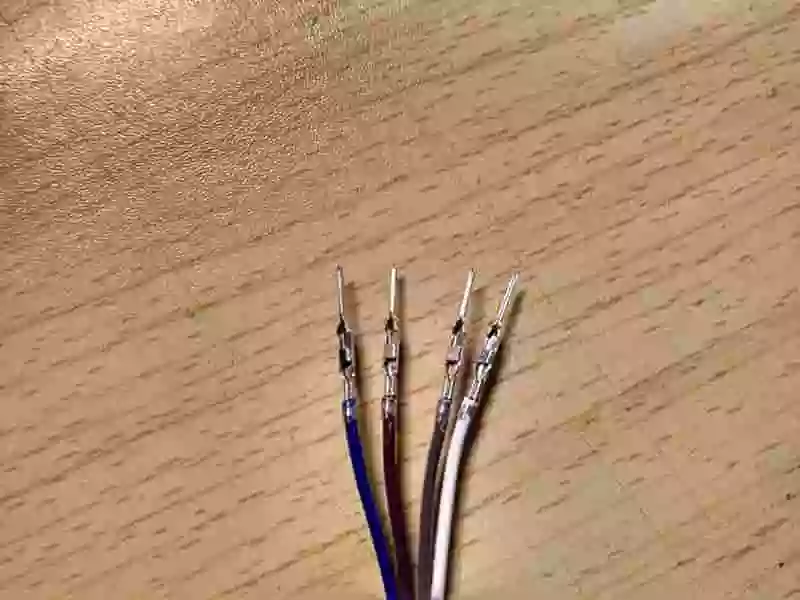
Then tie it with black tape and do insulation treatment.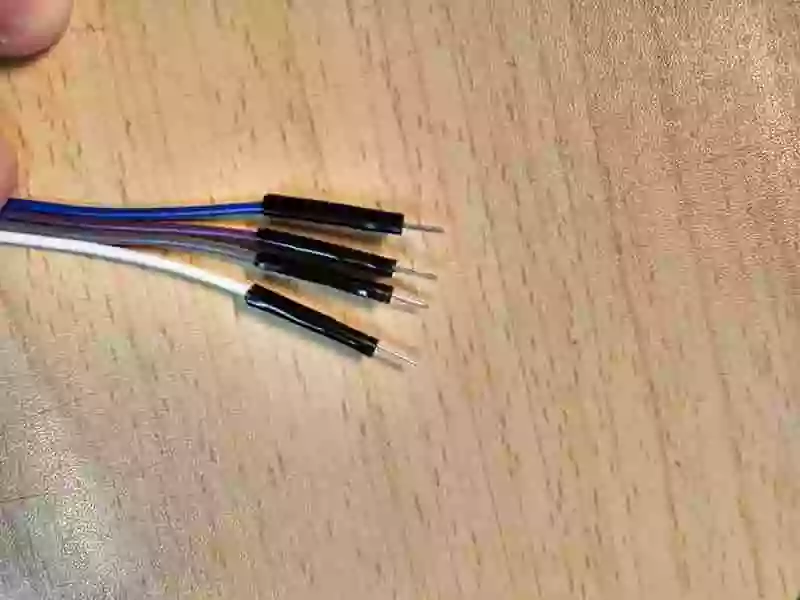
This will insert the interface normally.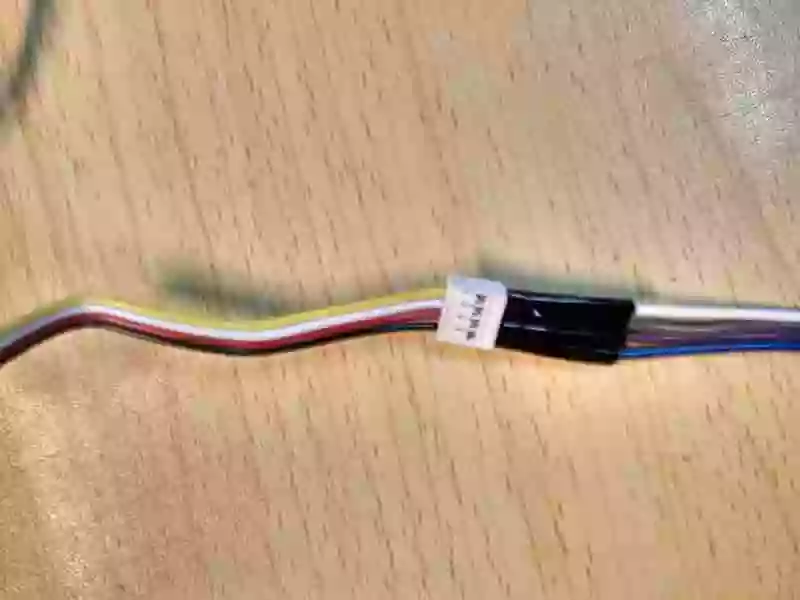
Song and code package download at here(Google Drive),Incidentally, the songs in the file are public copyright-free songs, and the code format is also very messy, because it is written in a hurry, only for trial run.